Cutting opal on a knife block or piece of sandpaper by hand is a worth while learning experience but is also very time consuming and hard on the hands. So, if your on a budget and looking to upgrade, doing your own DIY Opal Cutting machine can be a great next step for your learning experience.
Now using commercial machinery is not something I would recommend bleeding your account dry for unless you’re a professional jeweller wanting to expand to a commercial enterprise. If you’re crafty like me and so many others, than you can find a way to make your own DIY Opal Cutting machine and for a fraction of the price and let me tell you, there’s nothing quite like the satisfaction of creating a set up of your own.
Now, there are many DIY guides out there with different methodologies and parts and which guide you follow will all be determined by your resources, budget, and skills. This DIY Opal Cutting Machine guide however is directly written from my own experience. When I created my trusty steed, I didn’t have many resources, a big budget, or skills. However, now I do and that came down to asking advice, doing my research, and most importantly, taking my time.
Getting the parts together for your DIY Opal Cutting Machine
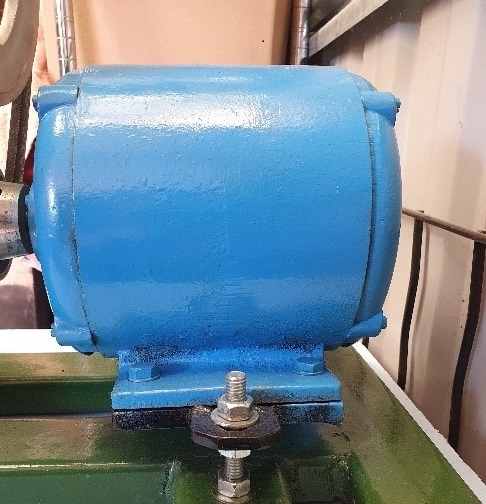
This is an AC motor and it is a quality vintage motor. Not everyone will be able to get this type of motor, but I highly advise finding a motor like this one and this can be done by calling up scrap yards or contacting older family members that may have old machinery lying around in the back shed.
This motor in particular is an old industrial laundry motor of all things. The most important thing to note when sourcing a motor is the RPMs. The ideal motor will need to be 1400 rpm max but if you can find a 1600 rpm motor it can be slowed using a pulley system like the one below which won’t cost more than $20-30 to source online OR a weighted plate like my machine, but if this is the case you will need to have the resources or know someone who can weld as well as an RPM measure. Depending on the state of your motor, you may need to wire a new power adaptor which is a fairly easy process requiring basic electronic equipment including pliers, a power adaptor, and a voltage tester.

Next, you’ll need a shaft or arbor that fits the measurement of your motor. They can be found very affordably on http://www.ebay.com.au or http://www.amazon.com.au. At this point you have one of two options, you can either follow my first design by welding a circular plate measuring 150mm onto the shaft of the motor or if you have a higher RPM machine you will need to use a pulley system with an arbor for sanding wheels which can be sourced online or from jewellery suppliers.
However, do note that this is a more expensive system. There are benefits to this system and I, am currently making a new Opal Cutting machine in this design so that I can quickly and easily finish opals without adjusting my wheel but my first design which I’m sharing with you will more than suffice for a budget set up.
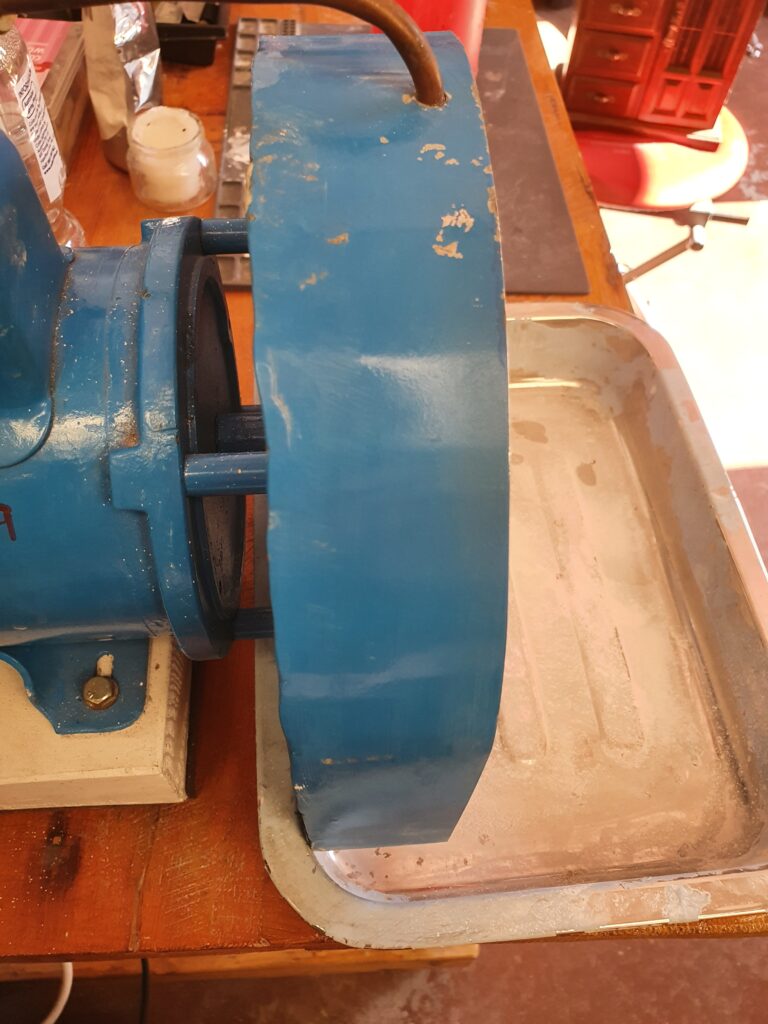
Following my initial design, once the plate is welded on to the shaft, the hard part is over and you can exhale slowly. Most of the following steps can be completed with a quick trip to http://www.bunnings.com.au.
To soften the surface of the plate I used 150mm wide protective foam. If you can get adhesive foam that’s even better but if you cannot, you’ll need to buy spray on glue, I use Selley’s Kwik Grip. You’ll also need 1200 grit sandpaper and 600 grit sandpaper, again if you can get adhesive sandpaper even better but if not, kwik grip will suffice for this as well. You’ll need to cut a 150mm wide circle out of the foam and adhere it to the plate using the kwik grip if needed.
Once the foam is dry you can then apply the grit of sandpaper you prefer to the padding which you’ll need to cut to size also using kwik grip if needed. The great thing about this is, once the grit wears, it’s easily removable.
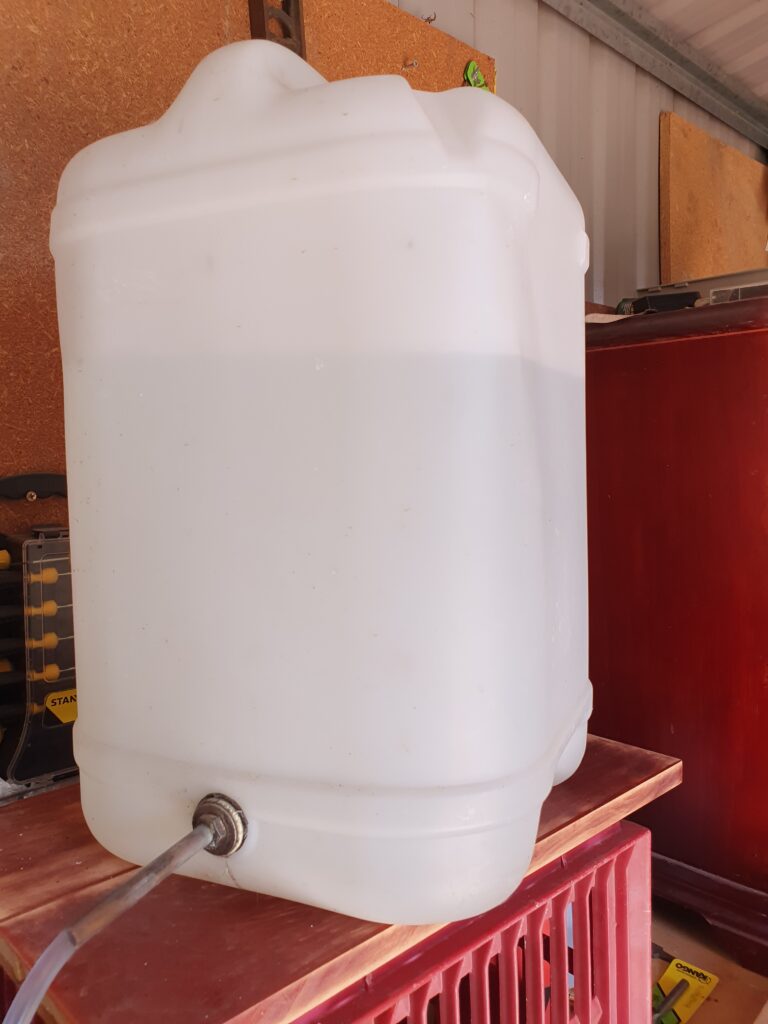
Next you’ll need some piping and a small plastic tap to insert into the piping. How you do you water set up and splash card is your choice. In my case, my grandfather machined a metal guard on to the motor to shield it from the water but a cut out 5 gallon heavy duty pucket will surfice just the same. For the water storage I used an old industrial detergent unit as it already has a tap to fix your piping to but a water container from coles or woolies will work just the same as seen below.
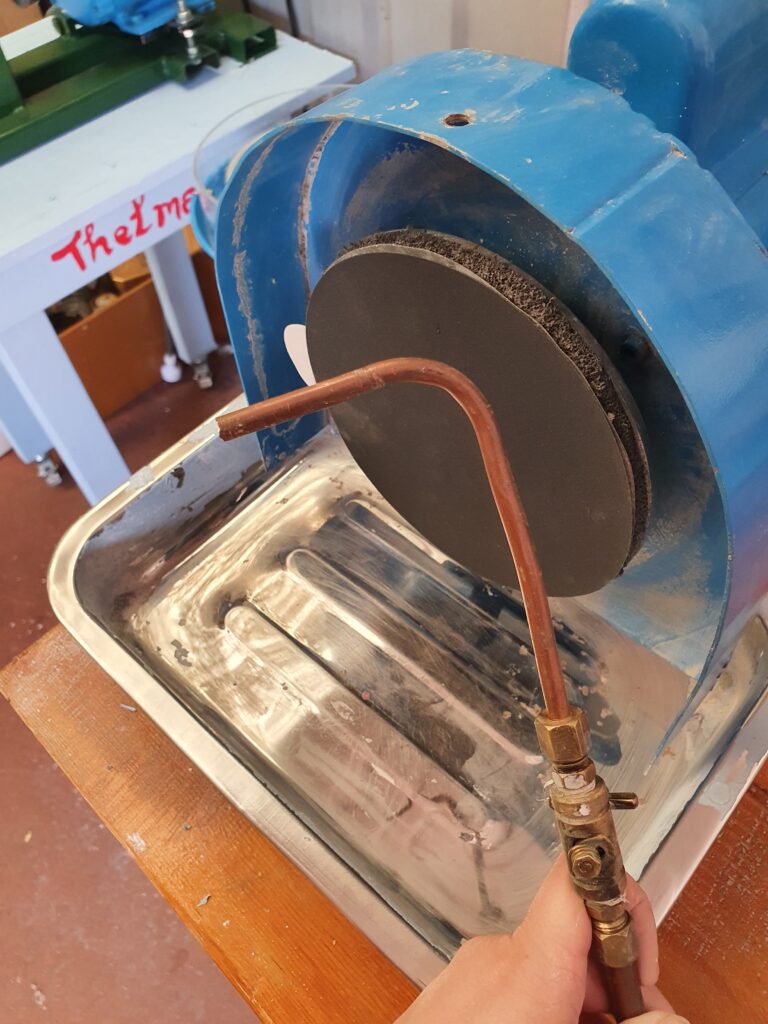
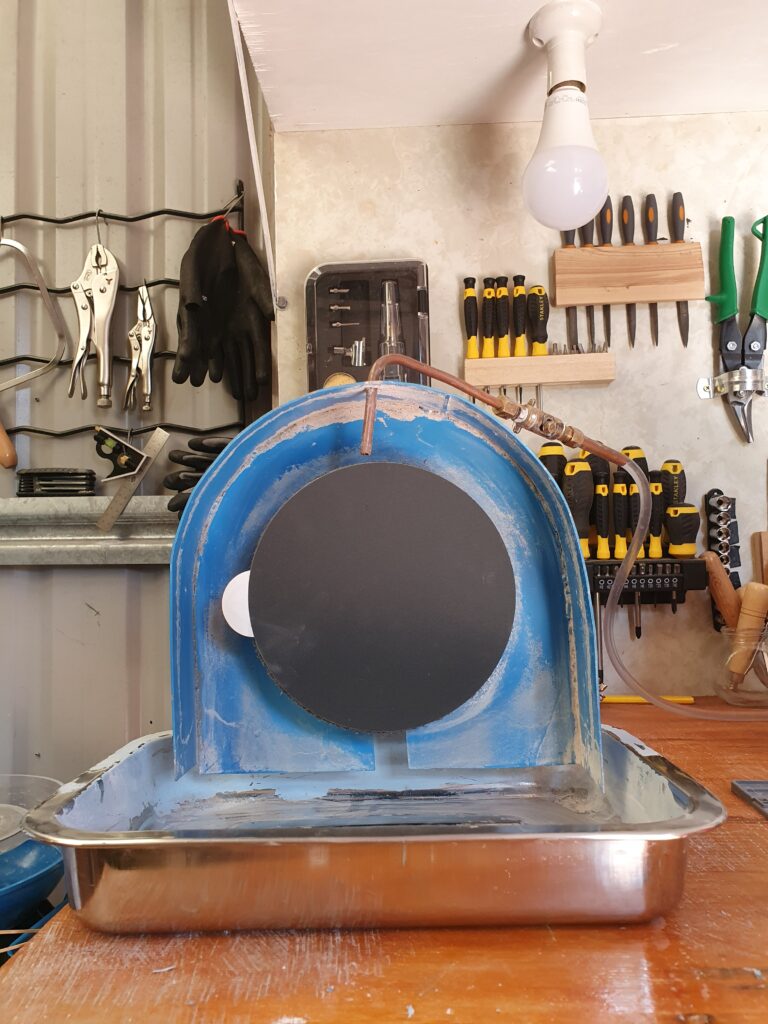
It’s just a matter of drilling a hole big enough for your tap into your guard and putting it in place with a tray beneath to trap the water. But remember, you don’t have to take the same approach as me, that’s the great thing about it, you can make it your own!
Looking for something to cut? Check out our rough in the store.